
HDR Photography for Real Estate: How to Enhance Property Photos
In the real estate market, high-quality visuals are no longer optional—they’re essential. Buyers often make their first impressions based on photos, and properties with eye-catching imagery tend to sell faster and for higher prices. This is where HDR (High Dynamic Range) photography comes into play, offering a method to create vibrant, detailed images that captivate potential buyers. In this guide, we’ll explore how HDR photography can elevate your real estate visuals and provide actionable real estate photography tips to help you master this technique.
Understanding HDR Photography in Real Estate
What Is HDR Photography?
HDR photography combines multiple images of the same scene, each captured at different exposure levels, into a single image. The goal is to balance the highlights, mid-tones, and shadows, creating a photo that looks more like what the human eye perceives in real life.
For real estate photography, HDR is especially valuable. It allows you to showcase the full range of light in a room, from the darkest corners to the sunlit windows, without losing detail. This technique is perfect for capturing interiors with high contrast lighting, such as a room with large windows letting in bright sunlight.
Why HDR Matters in Real Estate Photography
Traditional photography methods often struggle with high-contrast scenes. Without HDR, you may end up with overexposed windows or underexposed interiors, which fail to highlight the property’s features effectively. HDR solves these issues, producing images that are:
- Balanced: HDR ensures that both bright and dark areas are well-lit.
- Vivid: Colors appear richer and more realistic.
- Inviting: The overall composition becomes more visually appealing, drawing viewers in.
Getting Started with HDR Photography
Essential Equipment for HDR Real Estate Photography
Before diving into HDR photography, ensure you have the right tools:
- Camera: A DSLR or mirrorless camera with manual settings is ideal.
- Tripod: Stability is crucial for capturing multiple exposures of the same scene.
- Wide-Angle Lens: A wide-angle lens helps capture entire rooms.
- HDR Software: Programs like Adobe Lightroom, Photoshop, or Photomatix are commonly used for merging and editing HDR images.
Setting Up for Success
- Choose the Right Time: Shoot during the golden hours (early morning or late afternoon) to minimize harsh shadows and overly bright light.
- Use a Tripod: A stable camera ensures consistent framing for all exposures.
- Set Manual Mode: Control your camera’s exposure settings to capture a range of brightness levels.
- Shoot in RAW: RAW files retain more detail and offer greater flexibility in post-processing.
Capturing HDR Photos for Real Estate
The Bracketing Technique
Bracketing involves taking multiple shots of the same scene at different exposure levels. Typically, you’ll capture three to five images:
- One at normal exposure.
- One or two underexposed to preserve highlight details.
- One or two overexposed to brighten shadow areas.
Tips for Shooting Interiors
- Mind the Composition: Ensure your shots highlight key features of the space, such as a fireplace, large windows, or unique architectural elements.
- Balance Natural and Artificial Light: Turn on lights to complement natural light, but avoid mixing color temperatures (e.g., warm incandescent and cool daylight).
- Minimize Clutter: Clean and stage the room to make it more appealing.
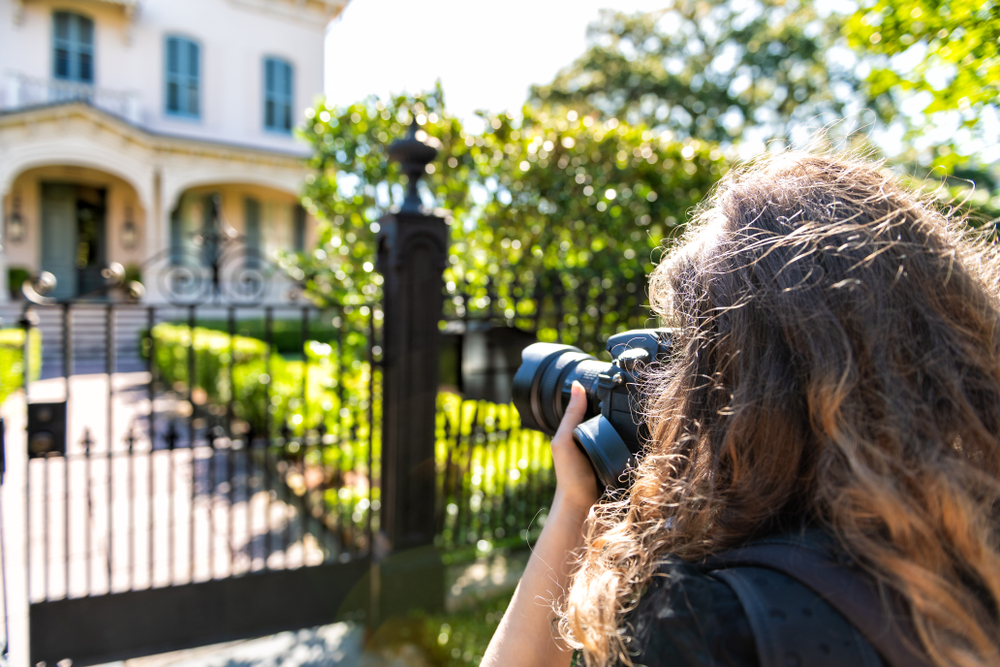
Tips for Shooting Exteriors
- Check the Weather: Overcast skies are often better for HDR photography, as they reduce harsh shadows.
- Include Landscaping: A well-maintained yard or garden adds value to the property.
- Focus on Key Angles: Capture the property’s facade, backyard, and unique outdoor features like a pool or deck.
Editing HDR Real Estate Photos
Merging Exposures
After capturing your bracketed shots, use HDR software to merge them. Follow these steps:
- Import Images: Load your bracketed images into the software.
- Align Photos: Ensure the images are perfectly aligned, especially if there was slight movement during shooting.
- Merge: Combine the exposures into a single HDR image.
Fine-Tuning in Post-Processing
- Adjust Brightness and Contrast: Ensure the image looks natural and well-balanced.
- Enhance Colors: Boost saturation subtly to make colors pop without looking artificial.
- Sharpen Details: Highlight textures, such as wood grain or tile patterns.
- Correct Distortions: Use software tools to straighten lines and correct lens distortion.
Avoiding Common Editing Mistakes
- Overprocessing: Avoid making the image look too surreal or unrealistic.
- Excessive Saturation: Keep colors true to life to maintain credibility.
- Ignoring White Balance: Ensure the color temperature matches the lighting in the scene.
Benefits of HDR for Real Estate Professionals
Captivating Listings
HDR photography enhances the appeal of online property listings. Buyers are more likely to click on listings with professional, high-quality images, increasing your chances of securing inquiries.
Faster Sales
Properties with stunning visuals attract more attention, often leading to quicker sales. By showcasing a home in its best light, HDR photography can shorten the time it spends on the market.
Competitive Edge
Using HDR photography sets you apart from competitors who rely on standard images. It demonstrates a commitment to quality and professionalism, which clients value.
Advanced Real Estate Photography Tips
Virtual Staging with HDR
Combine HDR photography with virtual staging to showcase empty spaces more effectively. Virtual furniture can help buyers visualize the potential of a room, creating a stronger emotional connection.
Aerial HDR Shots
For properties with large outdoor spaces or unique surroundings, consider using drones to capture HDR aerial shots. This perspective adds a “wow” factor to your listings.
Consistency Across Listings
Ensure all your listings feature a consistent style. This helps establish your brand identity and builds trust with potential buyers.
Conclusion
HDR photography is a game-changer for real estate professionals looking to create compelling, high-quality visuals. By mastering the techniques outlined above and following these real estate photography tips, you can elevate your listings, attract more buyers, and stay ahead of the competition. Invest in the right tools, practice your skills, and experiment with HDR editing to unlock the full potential of your property photos.
Whether you’re a seasoned photographer or a real estate agent looking to improve your marketing materials, HDR photography offers a powerful way to showcase properties in their best light. Start incorporating HDR into your workflow today and watch your listings stand out in a crowded market.
Need Real Estate HDR Outsourcing & Real Estate Photography Coaching in St. Cloud, MN?
Welcome to PixNevel, your premier destination for HDR image enhancement, real estate photography coaching, and day-to-dusk virtual staging. We specialize in transforming ordinary photos into stunning, high-quality visuals that capture attention and elevate any space. Our expert team not only uses advanced HDR techniques to enhance image clarity, color, and detail but also offers real estate coaching to help agents and photographers maximize the visual appeal of their listings. Additionally, our day-to-dusk photo editing and virtual staging services create captivating twilight scenes, adding warmth and allure to your properties.
Whether you’re looking to enhance your images or sharpen your real estate photography marketing skills, PixNevel has you covered. Contact us today to learn more about how we can support your success.